ONNXRuntime Inference in a React App
Inferencing on an ONNX model in a React App using ONNXRuntime Web.
July 25, 2024
08m Read
By: Abhilaksh Singh Reen

ONNX Runtime allows us to easily run models exported to ONNX in multiple languages and on multiple platforms. Today, we'll use onnxruntime-web to run inference with our ONNX model in a React application.
All the code for today's project can be found in this GitHub Repo.
The Model
The model we'll be using today is a Convolutional Neural Network trained using PyTorch and exported to ONNX. For a full tutorial where we train and export the exact model we'll use today, check out this Post.
Getting Started
The most straightforward way of creating a React App with all the necessary boilerplate is the create-react-app utility. However, out of the box, create-react-app does not support Web Assembly, which is required by onnxruntime-web. There are multiple ways around this such as by using react-app-rewired or by creating a react app without using create-react-app. But, there's a much simpler way (at least for our purpose) that we'll be using today.
Setup
In your project folder, create a new react app using cra.
npx create-react-app react-onnx-inferenceThis will create a new folder called react-onnx-inference in the current directory. cd into this folder and install the following packages.
npm install react-konva onnxruntime-webKonva is a 2D Canvas Library for JavaScript that we'll use to draw images of digits and then get our model to make predictions on them.
After the installation, there is a bit of a hack that we need to perform to get onnxruntime-web running in our cra application. Head to node_modules/onnxruntime-web/dist and copy all the files ending in .wasm. We'll paste these in public/static/js (you'll have to create the static/js folders). That's it. Now we can easily use onnxruntime-web.
The Home Page
Inside the src directory, create a new folder called pages and inside it create a file called Home.jsx. Let's add a simple component here for now.
export default function Home() {
  return (
    <div>Home</div>
  )
}
Now, head to src/App.js, delete everything, and add the following code:
import Home from "./pages/Home";

export default function App() {
  return (
    <div className="App">
      <Home />
    </div>
  );
}
We can now try running the application
npm startHead to localhost:3000 in your web browser (if it doesn't open automatically). You should see a page with the text "Home" on it.
Great! We can now start making changes to this page and add our canvas for drawing.
import { useRef, useState } from "react";
import { Stage, Layer, Line } from "react-konva";

import runInference from "../inferencing/onnx";

export default function Home() {
  const stageSize = Math.min(window.innerWidth * 0.9, window.innerHeight * 0.5);

  const [tool, setTool] = useState("pen");
  const [lines, setLines] = useState([]);
  const [strokeWidth, setStrokeWidth] = useState(15);
  const [prediction, setPrediction] = useState(null);

  const stageRef = useRef(null);
  const isDrawing = useRef(false);

  const handleMouseDown = (e) => {
    isDrawing.current = true;
    const pos = e.target.getStage().getPointerPosition();
    setLines([...lines, { tool, strokeWidth, points: [pos.x, pos.y] }]);

    setPrediction(null);
  };

  const handleMouseMove = (e) => {
    if (!isDrawing.current) {
      return;
    }

    const stage = e.target.getStage();
    const point = stage.getPointerPosition();
    let lastLine = lines[lines.length - 1];

    lastLine.points = lastLine.points.concat([point.x, point.y]);

    lines.splice(lines.length - 1, 1, lastLine);
    setLines(lines.concat());
  };

  const handleMouseUp = () => {
    isDrawing.current = false;
  };

  const handlePredictButtonClick = async (e) => {
    const imageDataUri = stageRef.current.toDataURL();

    const prediction = await runInference(imageDataUri);
    setPrediction(prediction);
  };

  return (
    <div
      style={{
        width: "100%",
        display: "flex",
        flexDirection: "column",
        justifyContent: "flex-start",
        alignItems: "center",
      }}
    >
      <h1>Drawn Digit Prediction</h1>

      <Stage
        ref={stageRef}
        width={stageSize}
        height={stageSize}
        onMouseDown={handleMouseDown}
        onMousemove={handleMouseMove}
        onMouseup={handleMouseUp}
        style={{
          border: "1px solid black",
        }}
      >
        <Layer>
          {lines.map((line, i) => (
            <Line
              key={i}
              points={line.points}
              stroke="#000000"
              strokeWidth={line.strokeWidth}
              tension={0.5}
              lineCap="round"
              lineJoin="round"
              globalCompositeOperation={line.tool === "eraser" ? "destination-out" : "source-over"}
            />
          ))}
        </Layer>
      </Stage>

      <div
        style={{
          width: stageSize,
          marginTop: 10,
          display: "flex",
          flexDirection: "row",
          justifyContent: "space-evenly",
          alignItems: "center",
        }}
      >
        <select
          value={tool}
          onChange={(e) => {
            setTool(e.target.value);
          }}
          style={{
            padding: "8px",
            borderRadius: "4px",
            border: "1px solid #ccc",
            fontSize: "16px",
          }}
        >
          <option value="pen">Pen</option>
          <option value="eraser">Eraser</option>
        </select>

        <select
          value={strokeWidth}
          onChange={(e) => {
            setStrokeWidth(parseInt(e.target.value));
          }}
          style={{
            padding: "8px",
            borderRadius: "4px",
            border: "1px solid #ccc",
            fontSize: "16px",
          }}
        >
          <option value="1">1</option>
          <option value="3">3</option>
          <option value="5">5</option>
          <option value="10">10</option>
          <option value="15">15</option>
          <option value="20">20</option>
          <option value="30">30</option>
          <option value="40">40</option>
          <option value="50">50</option>
        </select>

        <button
          onClick={() => setLines([])}
          style={{
            padding: "8px 12px",
            borderRadius: "4px",
            border: "1px solid #ccc",
            background: "#ffffff",
            color: "#333",
            fontSize: "16px",
            cursor: "pointer",
          }}
        >
          Clear
        </button>
      </div>

      <button
        onClick={handlePredictButtonClick}
        style={{
          padding: "8px 12px",
          borderRadius: "4px",
          border: "1px solid #444444",
          background: "#eeeeee",
          color: "#333",
          fontSize: "16px",
          cursor: "pointer",
          marginTop: 10,
          marginBottom: 5,
        }}
      >
        Predict
      </button>

      {prediction !== null && (
        <h4
          style={{
            margin: 0,
          }}
        >
          Probably a {prediction}
        </h4>
      )}

      <canvas id="tempCanvas" width={28} height={28}></canvas>
    </div>
  );
}
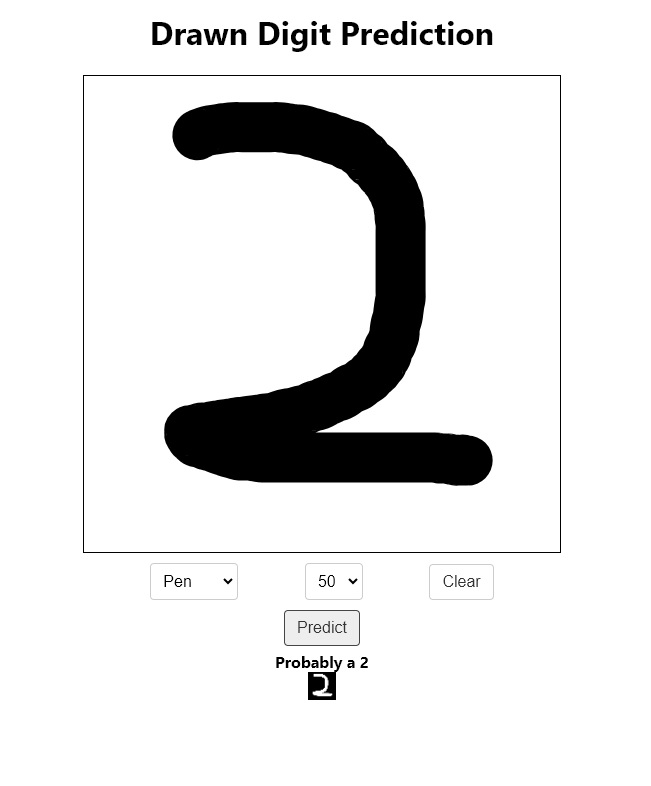
We have a Konva Stage that serves as our drawing area. When the user clicks down their mouse on this area, we set isDrawing to true and add a new line to the lines array with the current point, selected tool, and strokeWidth. In the Mousemove listener, we check if we are currently drawing and if so, we add the point to the last line. Finally, when the mouse is released, we set isDrawing to false.
We also have two dropdowns to select our drawing configuration and a Clear button to delete all the lines. Below this, we have a Predict button, on clicking this we extract the image from the stage in the form of a data URI, get the prediction using the runInference function (discussed in the next section), and set its value in the state.
Below the Predict button, we have a temporary canvas which we use to draw our image before passing it to the model. This is for debugging purposes only.
Running Inference
For loading the model in our app, it has to be served somewhere. Luckily, React can serve static files, we just need to put them into the public folder. So, take your model.onnx and place it in the public folder.
Knowing our Model
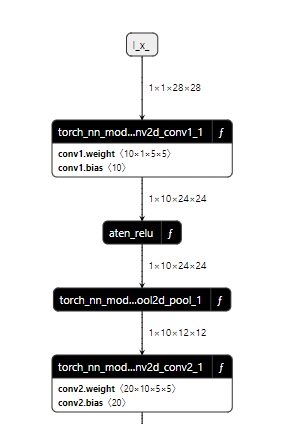
In order to run inference, we need to have some idea about the inputs our model is expecting and the outputs it returns to us. For this, we can use a tool like Netron which helps us visualize deep neural networks. Head to Netron

We see that the model expects an input of the shape [1, 1, 28, 28] (batch size, channels, width, height) and outputs us a softmax. Great, now we know what to give to and what to expect from our model.
Math Utils
Before we can run inference with our model, we'll need to create a couple of utility functions. In the src directory, create a new folder called utils and inside it create a file called mathUtils.js.
function softmax(resultArray) {
  const largestNumber = Math.max(...resultArray);

  const sumOfExp = resultArray
    .map((resultItem) => Math.exp(resultItem - largestNumber))
    .reduce((prevNumber, currentNumber) => prevNumber + currentNumber);

  return resultArray.map((resultValue, index) => {
    return Math.exp(resultValue - largestNumber) / sumOfExp;
  });
}

function indexMax(arr) {
  if (arr.length === 0) {
    return -1;
  }

  let max = arr[0];
  let maxIndex = 0;

  for (let i = 1; i < arr.length; i++) {
    if (arr[i] > max) {
      maxIndex = i;
      max = arr[i];
    }
  }

  return maxIndex;
}

export { softmax, indexMax };
We have defined our DIY softmax and indexMax functions. Softmax is an activation function that we call on our model's output to get the probabilities of various classes. indexMax (similar to numpy.argmax) simply gets us the index of the maximum value in an array.
Image Processing
We have to do a couple of more things before we can pass our images to our model:
1) We have to extract the greyscale image (28x28, 1 channel) from the data URI.
1) We have to convert it into a tensor
So, in the src folder, create a folder called inferencing and in it create a file called imageProcessing.js. Let's work on extracting the greyscale image first.
import ort from "onnxruntime-web";

const inputImageShape = [28, 28];
const inputShape = [1, 1, 28, 28];

function extractGreyscaleImageFromKonvaStage(imageDataUri, imageProcessingCanvasId) {
  const canvas = document.getElementById(imageProcessingCanvasId);
  const ctx = canvas.getContext("2d");

  const img = new Image();
  img.src = imageDataUri;

  return new Promise((resolve, reject) => {
    img.onload = () => {
      canvas.width = inputImageShape[0];
      canvas.height = inputImageShape[1];

      ctx.drawImage(img, 0, 0, inputImageShape[0], inputImageShape[1]);

      const imageData = ctx.getImageData(0, 0, inputImageShape[0], inputImageShape[1]);
      const imageArray = imageData.data;
      // r(1, 1), g(1, 1), b(1, 1), a(1, 1), r(2, 1), g(2, 1), b(2, 1), a(2, 1), ...

      const alphaChannelOnlyImageData = new ImageData(
        new Uint8ClampedArray(imageArray.length),
        inputImageShape[0],
        inputImageShape[1]
      );

      for (let i = 3; i < imageArray.length; i += 4) {
        alphaChannelOnlyImageData.data[i] = 255;
        alphaChannelOnlyImageData.data[i - 1] = imageArray[i];
        alphaChannelOnlyImageData.data[i - 2] = imageArray[i];
        alphaChannelOnlyImageData.data[i - 3] = imageArray[i];
      }

      ctx.putImageData(alphaChannelOnlyImageData, 0, 0); // Debug only

      const imageUint8Array = new Uint8Array(alphaChannelOnlyImageData.data.length / 4);

      // Take any one channel R, G, or B
      for (let i = 0; i < alphaChannelOnlyImageData.data.length; i += 4) {
        imageUint8Array[i / 4] = alphaChannelOnlyImageData.data[i];
      }

      resolve(imageUint8Array);
    };

    img.onerror = (error) => {
      reject(error);
    };
  });
}
Okay, so we create a canvas in the Home component called tempCanvas, let's put it to some use. In our function, we get this canvas and its context. We then create a new image with the given data URI. When this image loads, we resize it to 28x28 and extract the alpha channel. But why the alpha channel? The image that we draw in the browser is black on white. But, for Konva, the image is a black stroke on a transparent background i.e. all R, G, and B channels are 0 everywhere and the alpha channel is 255 wherever there is a stroke. So, after we draw the image on tempCanvas to resize it, we extract the alpha channel from the image data and draw it on the same canvas again for debugging. For creating the tensor that would be passed to the model, we take any one channel (R, G, or B) from the image and construct a 28x28 matrix of Uint8.
Right. But this 28x28 matrix is Uint 8, the values aren't normalized and they are not floats. That brings us to our second function:
function imageArrayToTensor(imageUint8Array) {
  let tensorValues = new Float32Array(imageUint8Array.length);

  for (let i = 0; i < imageUint8Array.length; i++) {
    tensorValues[i] = imageUint8Array[i] / 255;
  }

  const imageTensor = new ort.Tensor("float32", tensorValues, inputShape);
  return imageTensor;
}
We create a Float32Array of the same size as the input Uint8 array and set its values to that of the input array divided by 255 i.e. bringing the input values to the 0 to 1 range. Finally, we create an ort.Tensor using these values of the required input shape (as we saw in the visualization) and return it.
Here is the entire src/inferencing/imageProcessing.js file
import ort from "onnxruntime-web";

const inputImageShape = [28, 28];
const inputShape = [1, 1, 28, 28];

function extractGreyscaleImageFromKonvaStage(imageDataUri, imageProcessingCanvasId) {
  const canvas = document.getElementById(imageProcessingCanvasId);
  const ctx = canvas.getContext("2d");

  const img = new Image();
  img.src = imageDataUri;

  return new Promise((resolve, reject) => {
    img.onload = () => {
      canvas.width = inputImageShape[0];
      canvas.height = inputImageShape[1];

      ctx.drawImage(img, 0, 0, inputImageShape[0], inputImageShape[1]);

      const imageData = ctx.getImageData(0, 0, inputImageShape[0], inputImageShape[1]);
      const imageArray = imageData.data;
      // r(1, 1), g(1, 1), b(1, 1), a(1, 1), r(2, 1), g(2, 1), b(2, 1), a(2, 1), ...

      // Constructing the alphaChannelOnlyImageData only for drawing the image for debugging.
      const alphaChannelOnlyImageData = new ImageData(
        new Uint8ClampedArray(imageArray.length),
        inputImageShape[0],
        inputImageShape[1]
      );

      for (let i = 3; i < imageArray.length; i += 4) {
        alphaChannelOnlyImageData.data[i] = 255;
        alphaChannelOnlyImageData.data[i - 1] = imageArray[i];
        alphaChannelOnlyImageData.data[i - 2] = imageArray[i];
        alphaChannelOnlyImageData.data[i - 3] = imageArray[i];
      }

      ctx.putImageData(alphaChannelOnlyImageData, 0, 0); // Debug only

      const imageUint8Array = new Uint8Array(alphaChannelOnlyImageData.data.length / 4);

      // Take any one channel R, G, or B
      for (let i = 0; i < alphaChannelOnlyImageData.data.length; i += 4) {
        imageUint8Array[i / 4] = alphaChannelOnlyImageData.data[i];
      }

      resolve(imageUint8Array);
    };

    img.onerror = (error) => {
      reject(error);
    };
  });
}

function imageArrayToTensor(imageUint8Array) {
  let tensorValues = new Float32Array(imageUint8Array.length);

  for (let i = 0; i < imageUint8Array.length; i++) {
    tensorValues[i] = imageUint8Array[i] / 255;
  }

  const imageTensor = new ort.Tensor("float32", tensorValues, inputShape);
  return imageTensor;
}

export { extractGreyscaleImageFromKonvaStage, imageArrayToTensor };
ONNX Runtime Inference
Inside the src/inferencing folder, create a new file called onnx.js:
import ort from "onnxruntime-web";

import { extractGreyscaleImageFromKonvaStage, imageArrayToTensor } from "./imageProcessing";
import { softmax, indexMax } from "../utils/mathUtils";

const modelUrl = process.env.PUBLIC_URL + "/model.onnx";
const ortSession = await ort.InferenceSession.create(modelUrl);

async function runInference(imageDataUri) {
  const greyscaleImage = await extractGreyscaleImageFromKonvaStage(imageDataUri, "tempCanvas");
  const imageTensor = imageArrayToTensor(greyscaleImage);

  const feeds = {
    [ortSession.inputNames[0]]: imageTensor,
  };

  const outputData = await ortSession.run(feeds);
  const output = outputData[ortSession.outputNames[0]];

  const outputSoftmax = softmax(Array.prototype.slice.call(output.data));

  const outputClass = indexMax(outputSoftmax);
  return outputClass;
}

export default runInference;
In the runInference function, we extract the image from the data URI and convert it into a Tensor. We construct feeds where this tensor serves as the first model input (we only have one input) and then run the ORT session. With the received output, we put it through our softmax and finally use indexMax to get the class. Here, the index itself is the class since the classes range from 0 to 9.
With this function done, let's head back to localhost:3000 (you might need to refresh). Now, we can try drawing an image and hit the Predict button. You'll see a black-on-white image appear below the button and a prediction too.

Conclusion
Congratulations. Today, we've learned the way to run ML inference on the client side right in our web browser. Running inference this way is immensely beneficial because we can serve a static application and not have to set up, maintain, and pay for backend servers.
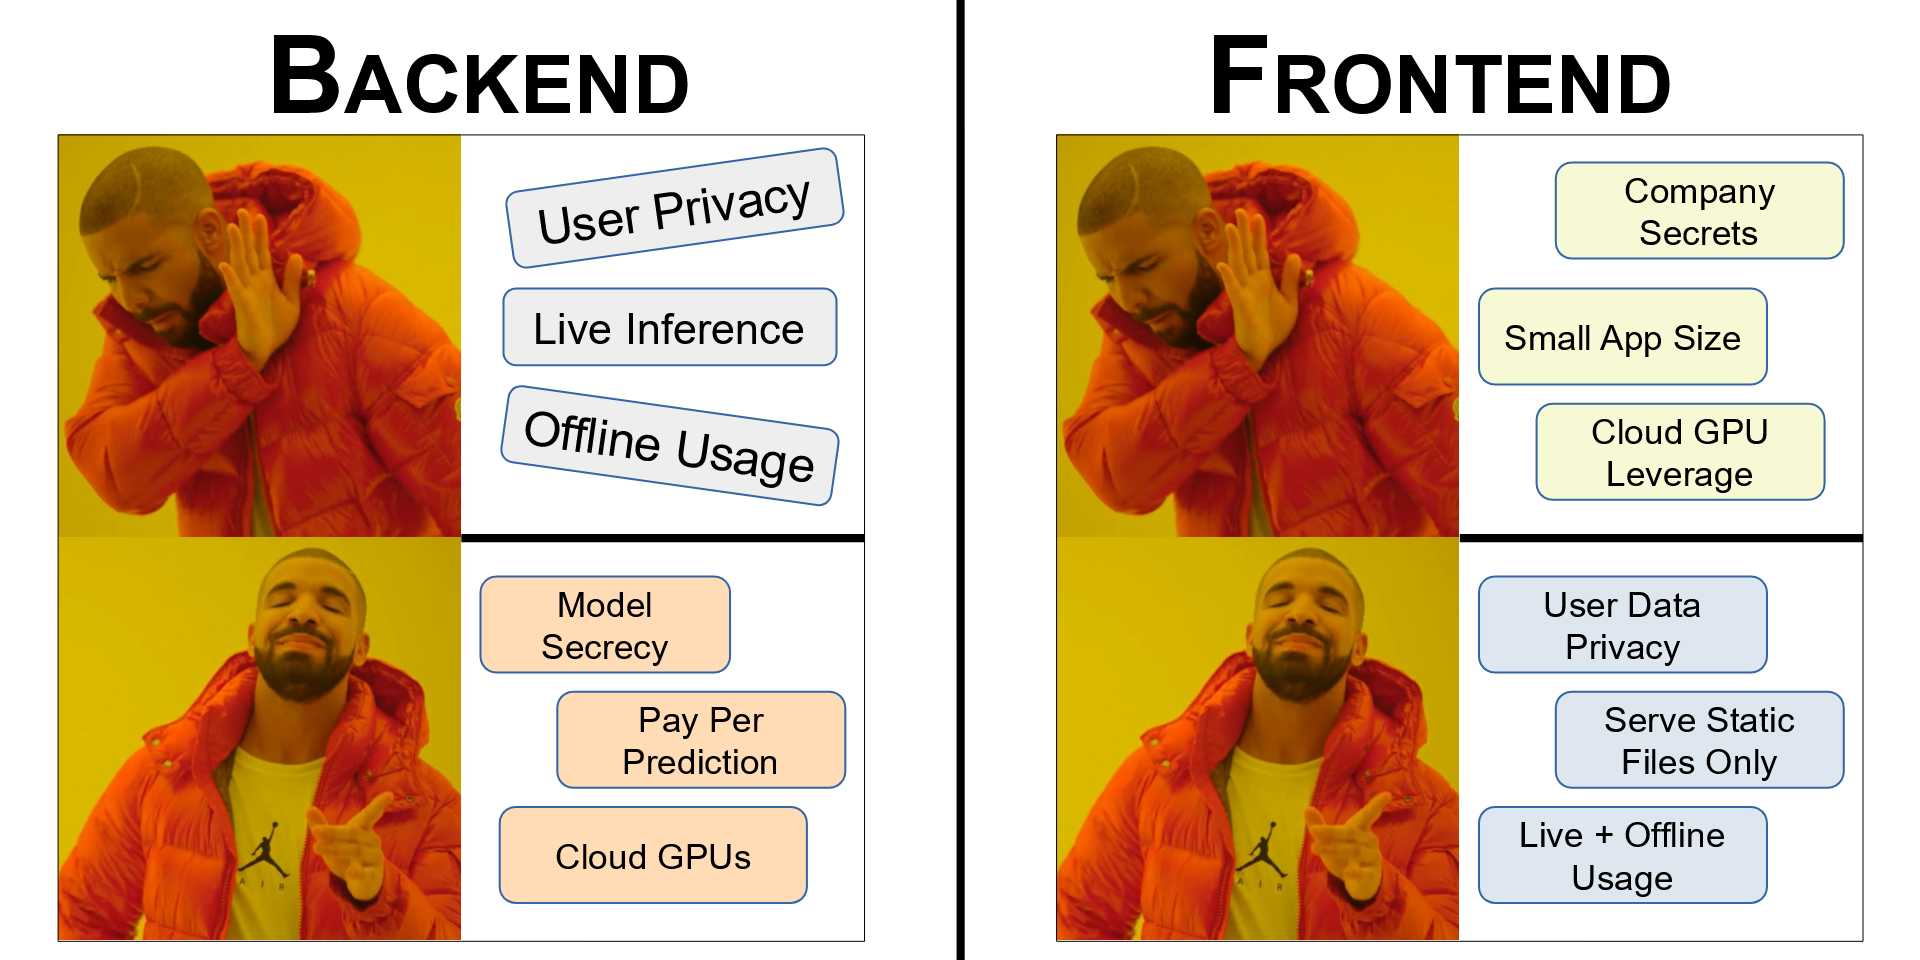
However, there can be some downsides. If you would like to find out more about the pros and cons of having your model on the Frontend vs the Backend, you would like to check out this Post. We also go over some cases in which deploying either on the Frontend or the Backend is clearly superior.
See you next time :)
